The Interior Design Welcome Kit That Wins Clients
Here is the reframe that changes everything about your welcome kit. It is not a thank-you gift you hand over once the ink is dry. It is a marketing tool you use before your client has committed to anything.
That one distinction is the whole game. When you deliver a welcome kit after they have signed the agreement and paid their design investment, it becomes part of your first-class client care. Lovely. But they are already on board. When you deliver it before, at your first home consultation or hand-delivered ahead of your meeting, it does the selling for you. It warms up the client and cements that you are the right choice, because you have already decided you want to work with them.
Let me walk you through exactly what goes inside, and how to make it good enough that a client hangs onto it for decades.
Deliver It Before They Commit, Not After
There is a lot of confusion around timing, so let me make it simple. My recommendation is that your welcome kit is printed, not strictly digital, and delivered in a gorgeous, branded folder at your first in-home consultation. Create it in a way that they will want to leave it on their coffee table, ready for friends who stop by to see it.
Another option is to get it into their hands before you meet, by courier or priority mail. I have a designer doing exactly this right now. It is extra work and an extra investment, and when you go the mail route you have to time it carefully, because those services are not as reliable as they were before the pandemic. But when you pull it off, you warm up the potential client, and you cement the fact that you are the best choice for the opportunity.
So decide when you are using it and decide how. Remember, the whole point is to welcome them in advance of their commitment, before the agreement is signed. That is what makes it a marketing tool.
Printed, Digital, or Boxed: Match the Kit to the Opportunity
Everybody is racing to Canva looking for a template. That’s fine, well and good. But let me tell you why I want you to consider print.
The welcome kit I have in my hands today is the one I started with nearly 25 years ago. It came back to me because a client I had done three homes for hung onto it that long. After her last move, she came across it, texted me a photo of the Welcome Kit, and asked whether I would like it. I absolutely would. She mailed it to me. A digital leave-behind does not have that kind of staying power. And let’s face it, most clients are getting an avalanche of email every day, particularly at work, while mailboxes are nearly empty. It’s much easier to stand out by snail mail.
We are in a sensory industry. We bring clients samples so they can touch and feel them. They sit-test upholstery. One of our jobs is to create a marketing and design experience that engages all five senses. A digital kit taps sight, and maybe sound when you add music. Print lets you reach further, and you can even fold in a component of scent.
Here is the freeing part. One size does not fit all. You get to decide which potential client gets the digital, which gets the printed folder, and which gets the full boxed presentation. How significant is the opportunity? How much do you want to wow them? Many of my designers work three client avatars at different levels, so it makes sense to tailor the kit to the client in front of you.
What Goes Inside, Starting With Meet the Firm
Whether it is digital or physical, the contents are the same. Start with a Meet the Firm page. I love that phrasing far more than Meet the Designer, because it is friendlier and more intimate, and it signals you are not a one-person show scrambling to do everything. Team includes your reps, your installers, your workrooms, your contractors, you simply don’t dish on them beyond saying “we have an exceptional team of manufacturers, installers…..that we bring to every project.” (Solves a lack of team issue.)
Include a short blurb about you, plus your critical team members and their contact details, especially anyone the client will deal with directly, like a project manager, senior designer, bookkeeper, or office manager. And you can include part time remote without divulging those details. You do not want to be the front line.
When you are a solopreneur today, you are the front line for now, but get yourself even a part-time assistant sooner than you think you need one, so you can stay in your zone of genius instead of chasing dollars and fielding every call. Every design firm benefits from an intern as well, and that’s the perfect opportunity to check out performance and fit before becoming a design assistant.
And add a little something human. Who are you when you are not designing? That matters more than you would guess. Are you a devoted wife or husband, a dog mom/dad, cat staff, into golf or pickleball, love to bake cookies, travel globally (name three favorite destinations). Bring some vulnerability and personality to play, include an engaging collage of pics of you.
Lead With Your Process, Never Your Services
Your kit shares your process, not your services. You are the expert on what services a client needs. That is not up to them. So instead of a service menu, give them a step-by-step process, illustrated with an image of what each step really looks like. Think mood board, floor plans, construction docs, selection boards, styling, you get the idea.
Aim for five to seven steps. Go to ten when you truly must, and no further. You and I both know design could easily be a 35-step process, but the client does not need to see that. It overwhelms them. Bundle the detail underneath a smaller number of clear steps. This is for clarity and confidence. One sheet is ideal, two to three pages is fine, as long as it is clean and in client-friendly language.
That last part is where designers trip. Steer clear of design speak. I found out that one of my clients, a brilliant, retired engineer, did not know the word rendering. Why would he? It is an industry term, not common speech. So, I stopped using it. Now I call it a photorealistic illustration, and he knew exactly what I meant.
Even the sharpest clients will not admit when a term loses them, because they are embarrassed. Bring it down so there is never a question. This is also why I say the big reveal instead of installation. Installation does not sound sexy, and the reveal is not an ending, it is the start of a whole new relationship.
Case Studies and Testimonials That Do the Quiet Selling
Weave testimonials through the entire document rather than parking them on one page. Land a couple on the Meet the Firm page. Drop one on the process piece. They’re far more effective woven in.
Then come your case studies. Build a library of five to seven in advance and pull only the two or three that match the client in front of you. Doing a kitchen remodel? Bring your kitchen remodel case study. Doing design and decorate? Bring those.
Each case study is a project brief of a line or two, up to three bullet points on the challenges the client brought you, your solution with three features of how you solved it, and the client’s experience working with you, which is your testimonial. Keep it brief. No one reads a novel. We are in the image age, so include before and after photos, and where you can, a floor plan, a flat lay, or your selection board so they see your process in action.
For the numbers, think HGTV style, not spreadsheet. They pop up a broad set of figures, no minutiae. On a bath remodel you might show tile including installation, a new jetted tub, all lighting, all plumbing, glass enclosure, paint/wallcovering, hardware, contract labor, and your design investment. Enough detail to orient them, never line by line.
One more piece I love to include is a timeline. This makes designers nervous, and I get it, but clients are not asking for a guarantee. This is an estimated timeline of completion, barring unforeseen delays and force majeure, which covers everything from product delays to acts of God.
When your average kitchen or bath takes six months, they need to know that. Month by month is plenty. You are giving them the framework, enough detail to excite them, not enough to overwhelm them. Keep the whole kit at an eighth-grade reading level. That is where television lives, and it works.
The Investment Guideline That Grows Your Bottom Line
There is one more document that does a lot of heavy lifting, especially for a client who has never worked with a designer. I call it the Interior Investment Guideline, also known as your Furnishings Investment Guide. Please do not call it a furnishings budget. Get rid of the B word and watch your bottom line grow.
Take three rooms, usually a living room, a dining room, and an owner’s suite or primary bedroom. Do not simply say bedroom, that is too vague, and there should be a difference in investment between a guest room, a child’s room, and an owner’s suite. Lay each room out room by room, not as a spreadsheet but as something sexy that carries the same intel. List the pieces on the left, quantities down the middle, and retail numbers on the far right, so the client gets a springboard for what a realistic room investment requires.
When you present the levels, skip low, medium, high. Use better and best, or semi-custom and custom. I have dropped from three tiers to two, because in our current overload age, more options lock a client up. And notice I avoid the word luxury. There are plenty of people comfortable with premium, and some who will invest at the top simply because the word elite speaks to them.
This same document names where your design investment starts, your procurement management charge, and that shipping and handling is separate. It can live as a download on your website too, unless you serve high and ultra-high-net-worth clients, who generally prefer that not everyone knows what they invest. And when your current numbers feel low, try adding five or ten thousand and see what happens. You are setting new expectations, and clients often rise right to them.
Make It Beautiful Enough to Keep for 25 Years
Your kit must be graphic and gorgeous, digital and printed. When you want a benchmark, go look at The Scout Guide. It does not matter which city. The covers are colorful, they carry a metallic logo, and they are the kind of thing you would happily leave on a coffee table or carry in your bag. Print yours in a matte finish on heavyweight cardstock, and use every surface, including the back, for a couple of juicy testimonials and a few more images.
When it is good-looking, a prospect glances at it and asks, what is that? And you get to say, we like to welcome new clients, and while we have not created your proposal yet, we are confident we are going to be working together. That is a bold move. Go for bold. It is not pushy, it is confident, and it tells them you will go the extra mile to give them clarity and confidence in your process.
One more thought as you build this out. The top of the market prefers fewer invoices and fewer charges. One of my clients had a celebrity client who said, “We are not concerned about how much you charge, we want one invoice, one investment.” Every invoice is a reminder of what a client is investing, so fewer reminders, even in larger sums, keep them excited for the reveal instead of watching the meter.
Ready to Land Your Ideal Clients?
Your welcome kit is you taking the work you have already done and turning it into a tool that lands new, awesome work. That is the whole point. When you know how to guide a client from that first glance through to the big reveal, you land the ideal ones and let go of the rest.
Grab your copy of my book, Design Discovery: The Proven Process to Land Ideal Clients and Grow Profit, and build the client experience that makes yes the only answer.
Listen to this episode on Design Business Freedom™ Podcast – Episode 200
Available on Apple Podcasts, Spotify, Audacy, Deezer, Podchaser, and Everand.
GET MORE OF MELISSA, ON THE PODCAST!
Subscribe to the podcast, Design Business Freedom™, and get the best in smart systems, proven processes, and the right strategies and resources to take your design practice to the next level.
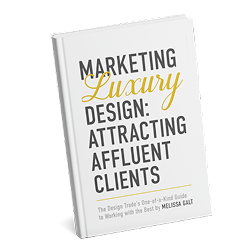
Marketing Luxury Design: Attracting Affluent Clients
The Design Trade’s One-of-a-Kind Guide to Working with the Best

The Language of Success
Your One-Of-A-Kind Guide To Greater Confidence and More Success